hints The Knight’s Challenge


The Large Chest
Hint 1A
Find all 9 symbols with corresponding numbers around the room.
Hint 1B
Location of the symbols:
- bookshelf
- book on bookshelf
- wall tapestry
- shelf
- turntable puzzle in suitcase (find the key first)
- table
- statue
- pillow
- hatch
Hint 1C
Symbol number combination:
Chicken = 1
Sword = 2
Shield = 3
Rose = 4
Dragon = 5
Flag = 6
Castle = 7
House = 8
Dog = 9
Hint 2A
Solve the maze and find out which six numbers are encountered along the way.
Hint 2B

Hint 2C
The numbers of the maze: 7 – 6 – 3 – 2 – 8 – 4
Hint 3
Combine the numbers of the maze and the symbols to get the code of the chest.
Hint 4
Enter the symbols in the chest.
Answer
castle – flag – shield – sword – house – rose

The Brave Knight
Hint 1A
Find the map.
Hint 1B
The map is found in the large chest.
Hint 2A
Find a book that describes a route.
Hint 2B
you can find the book ‘The Brave Knight’ on the bookshelf.
Hint 3
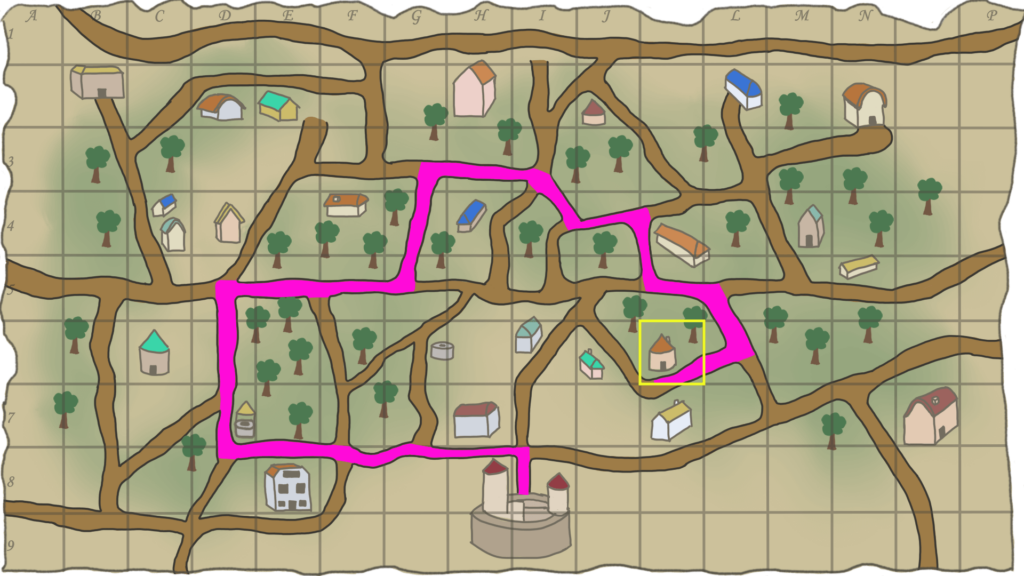
Follow the route of the story on the map.
Hint 4A
In the story some animals are mentioned. Find these animals in the room.
Hint 4B
The animals are visible as statues outside the windows.
Hint 5A
Follow the complete route on the map. Look to where the statues are pointing. And find out where the knight ends up.
Hint 5B
Hint 6A
Find out where you can enter this code.
Hint 6B
Somewhere in the room the map is visible a second time.
Hint 6C
You can click on the map on the wall tapestry.
Hint 7A
Enter the code in the wall safe.
Hint 7B
You can find the code on the map. Look at the square in which the knight ends their journey.
Hint 7C
The code exist of a letter and a number.
Answer
The code is K6.
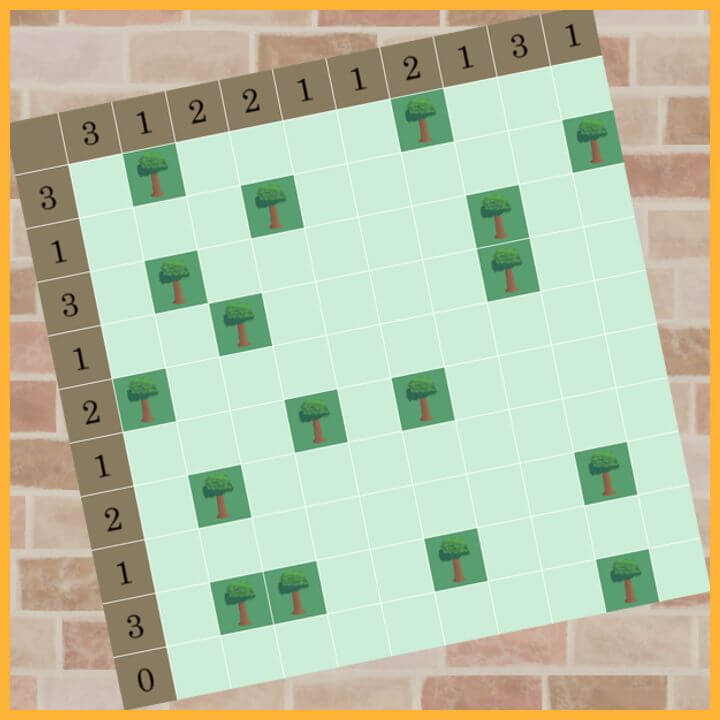
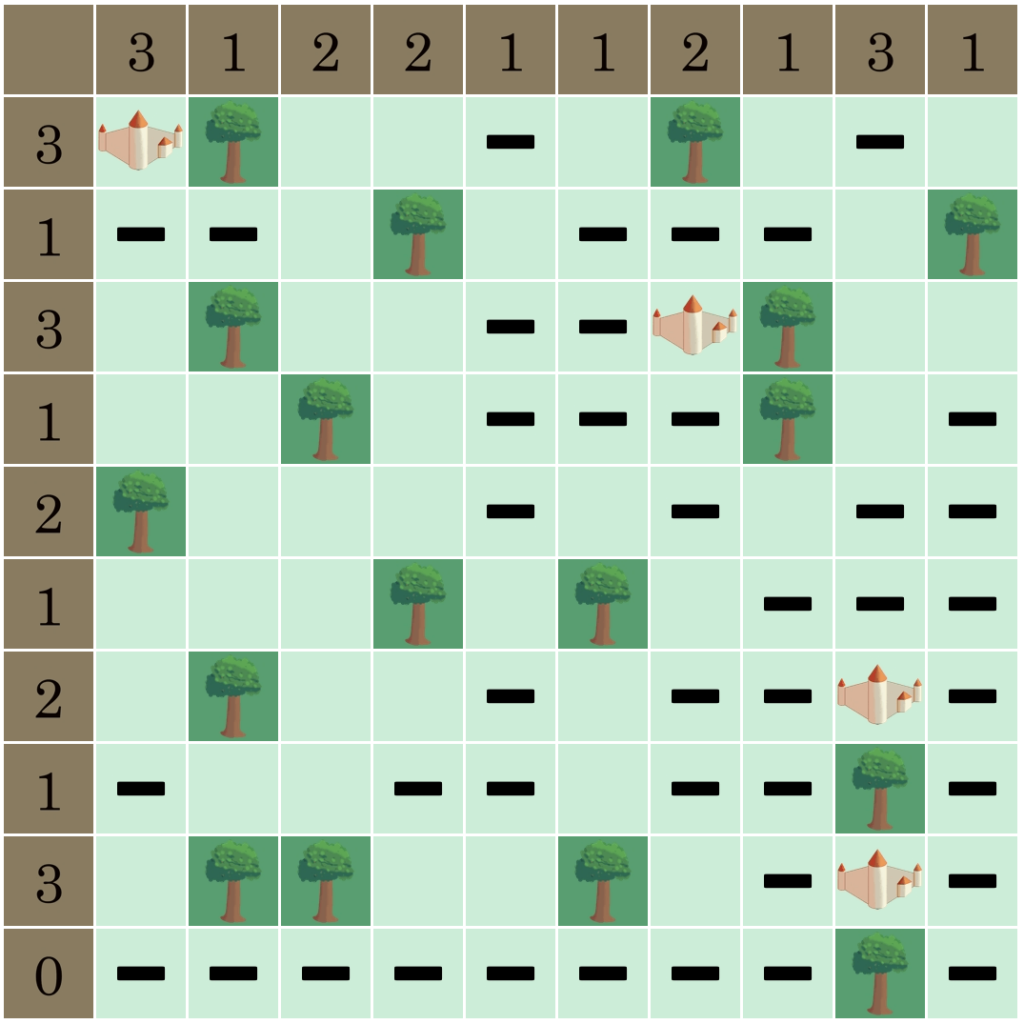
Castles & Trees puzzle
Hint 1A
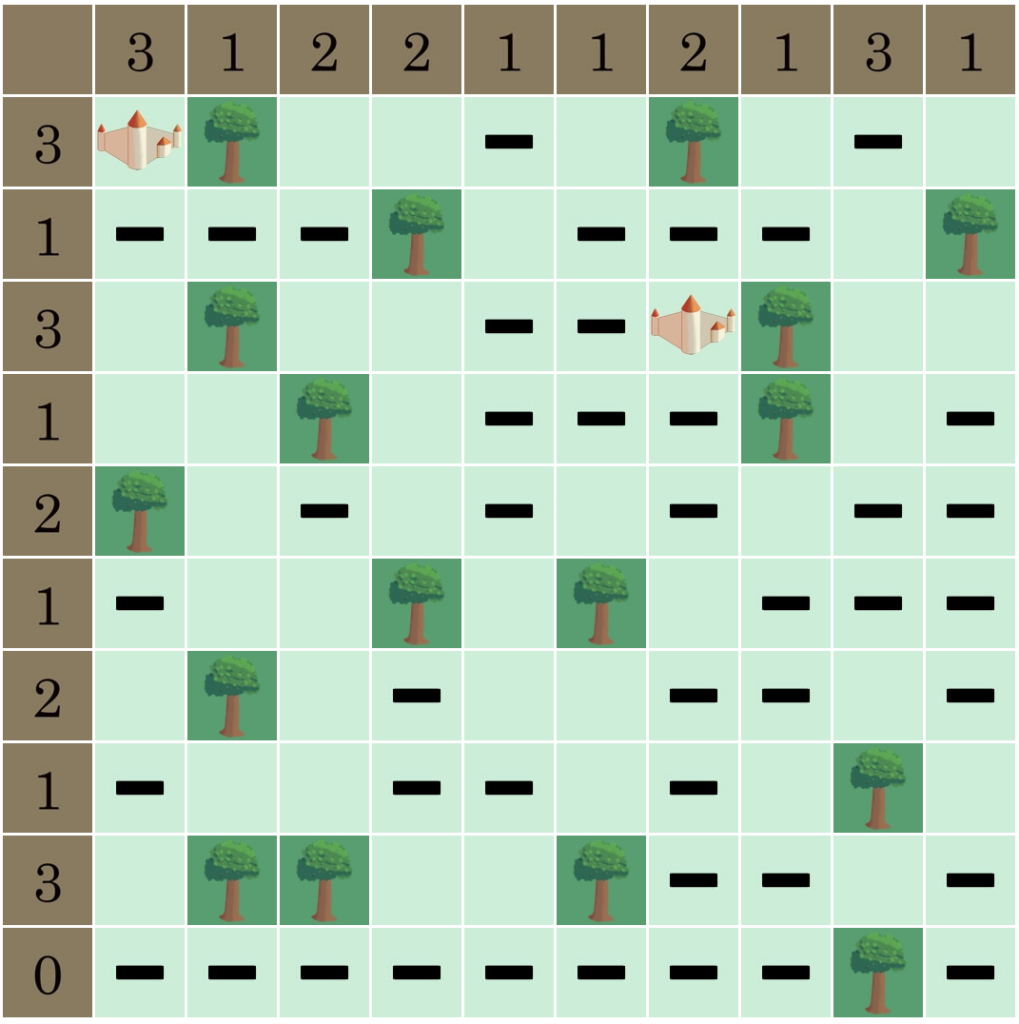
Use the dashes to mark the places where no castle can be placed.
- Places that are not next to trees.
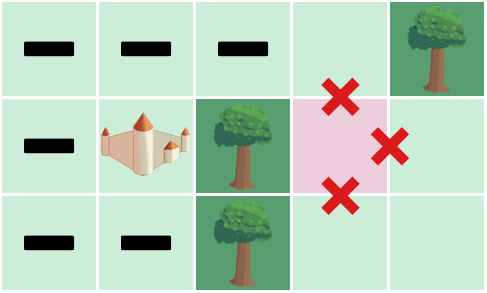
- Places next to other castles.
- Places in a row or column with the 0.
- Places in a row where the number of castles is equal to the number of the row.
Hint 1B
Hint 2A
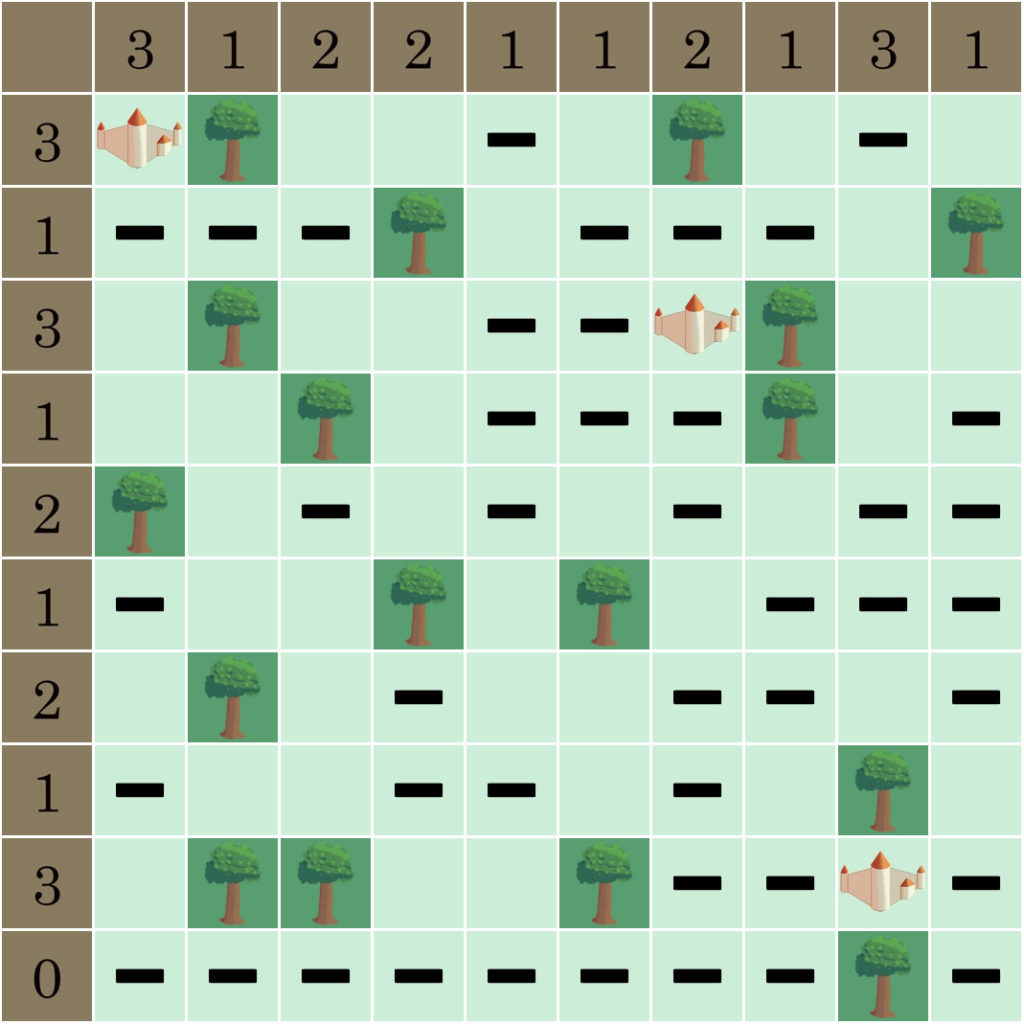
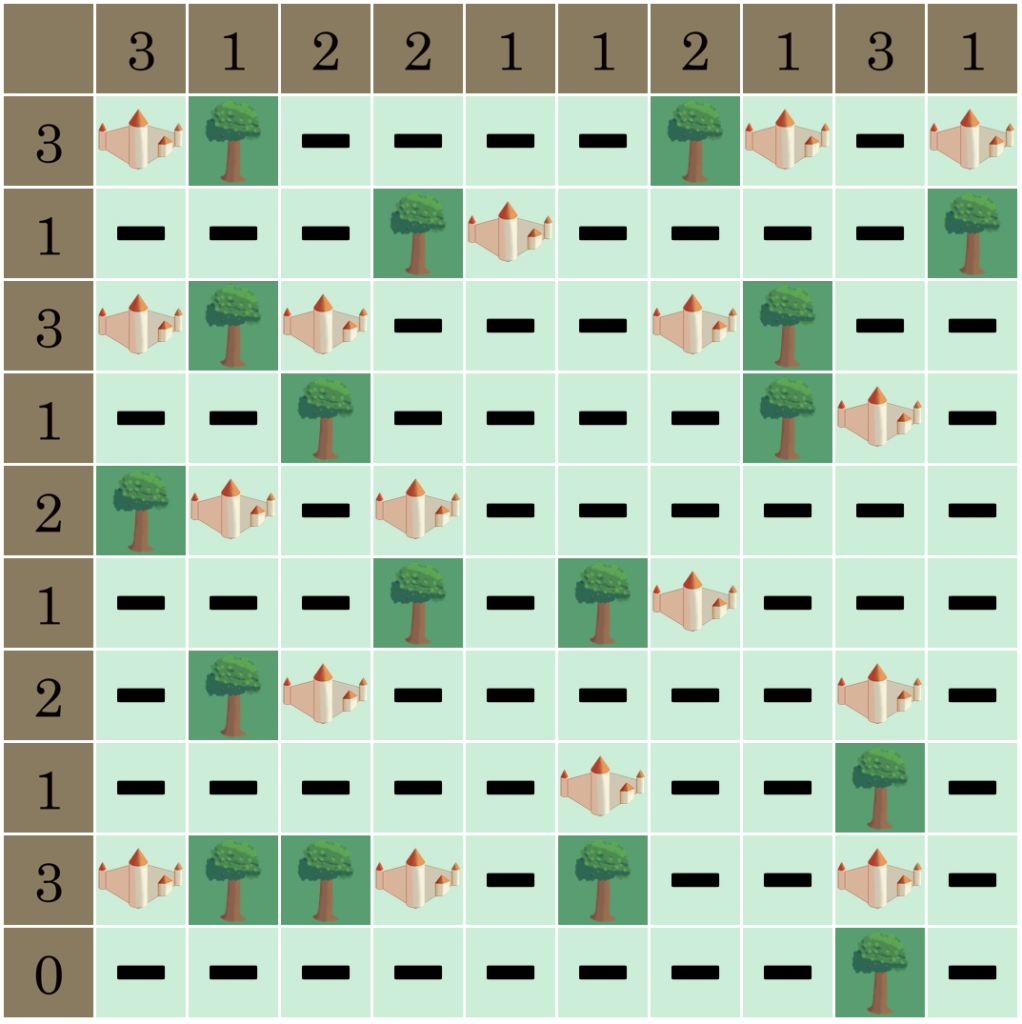
Try and find the trees where there is only one place for a castle.
Hint 2B
Hint 3A
A tree can only have one castle next to it unless a second castle forms a pair with another nearby tree.
Hint 3B
Hint 4A
Hint 4B
Answer
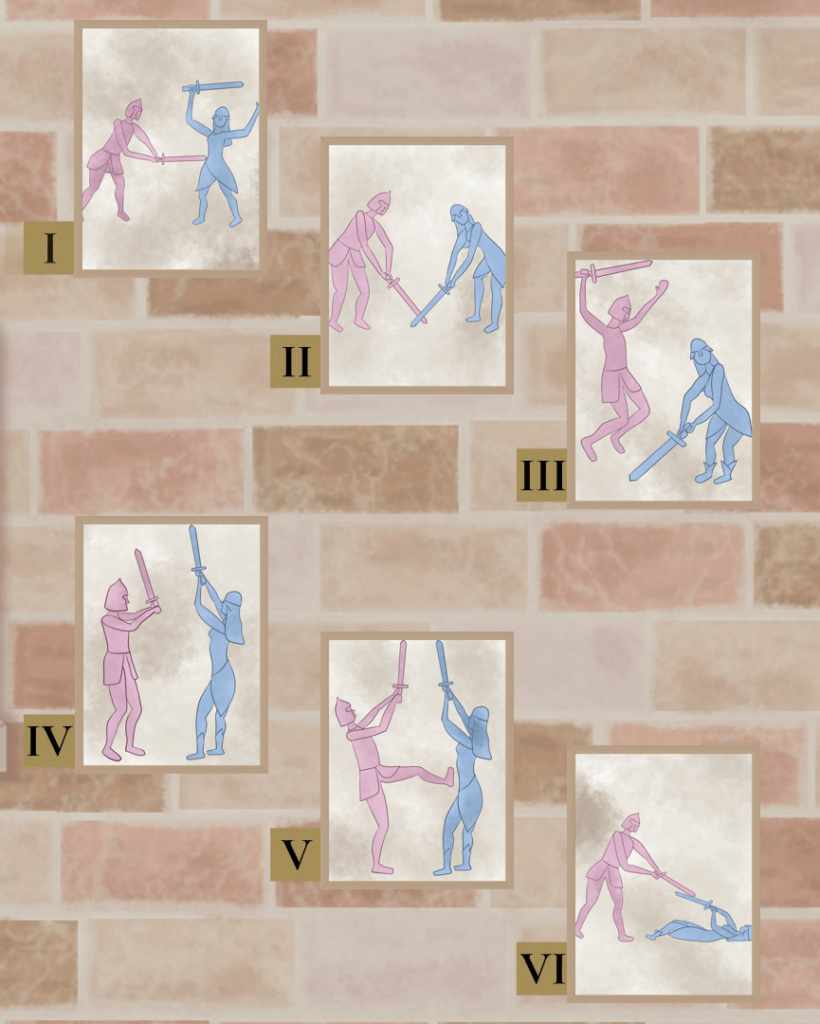
Paintings
Hint 1A
Find the paintings.
Hint 1B
The stack of paintings can be found in the box with the castles and trees puzzel.
Hint 2A
Place the paintings on the correct wall.
Hint 2B
The correct wall has spaces for the paintings, next to the shelf.
Hint 3A
Find the text that describes the fight.
Hint 3B
On the walls/ceilings.
Hint 3C
The beginning of the text starts with a capitalized letter.
Hint 3D


Hint 4A
Use the text to choose the right paintings in the right order and put them on the wall.
Hint 4B
I – 4
II – 5
III – 2
IV – 6
V – 3
VI – 7
Answer
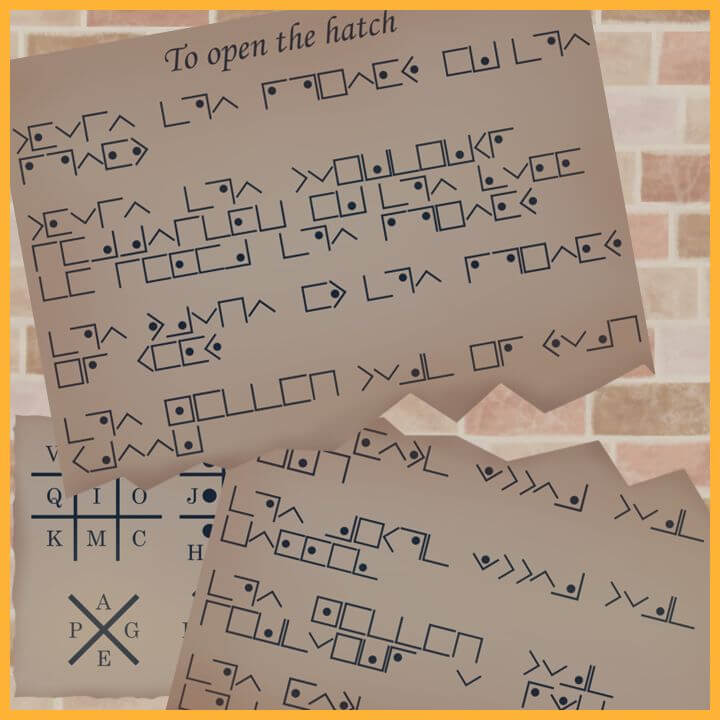
Secret Code Letters
Hint 1A
Find the three parts of a letter and a page with the code.
Hint 1B
The location of the parts:
Letter with the code in the box with the castles and trees puzzle.
Part 1 of the letter in a book on the bookshelf.
Part 2 of the letter beneath the armour.
Part 3 of the letter behind a plant and a stack of books.
Hint 2
Place the parts of the letter and the letter with the code on the desk.
Hint 3
Use the paper to write down the decoded text. You can pick up the paper.
Answer
The text:
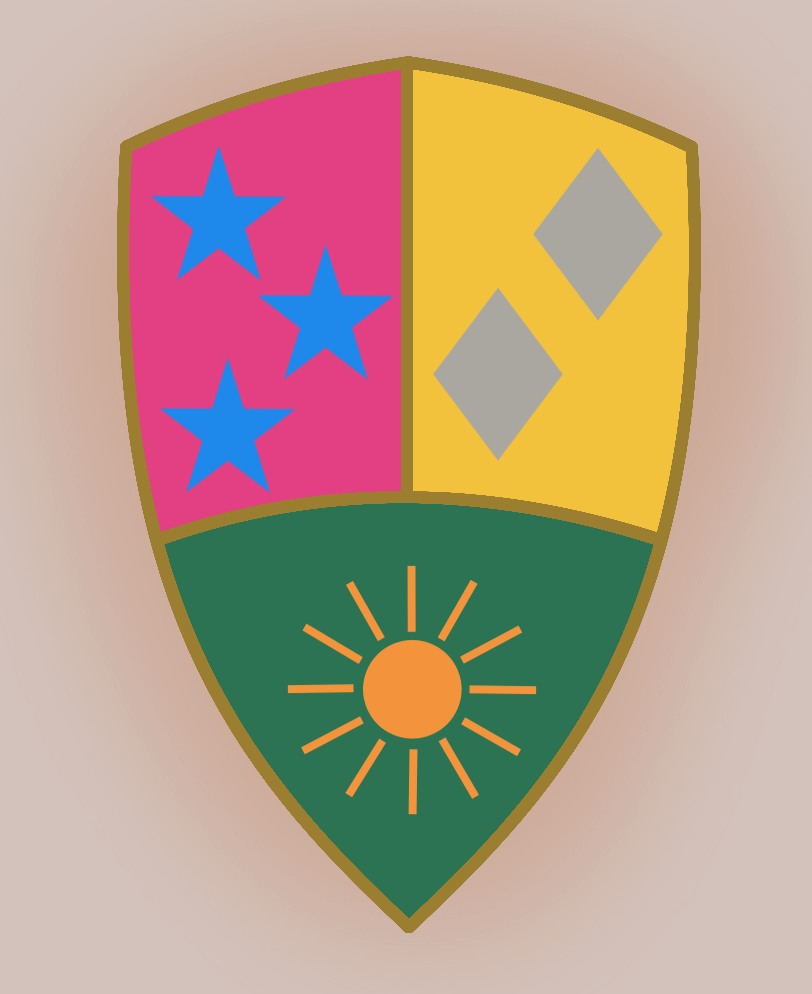
Place the shield on the shelf
Place the paintings correctly on the wall to color the shield
The frame of the shield is gold
The bottom part is dark green
The left upper part is pink
The right upper part is yellow
The bottom part contains a sun
The left part contains three stars
There are two diamonds in the right upper part
The symbol in the bottom part is orange
The stars are blue
The right part contains silver figures
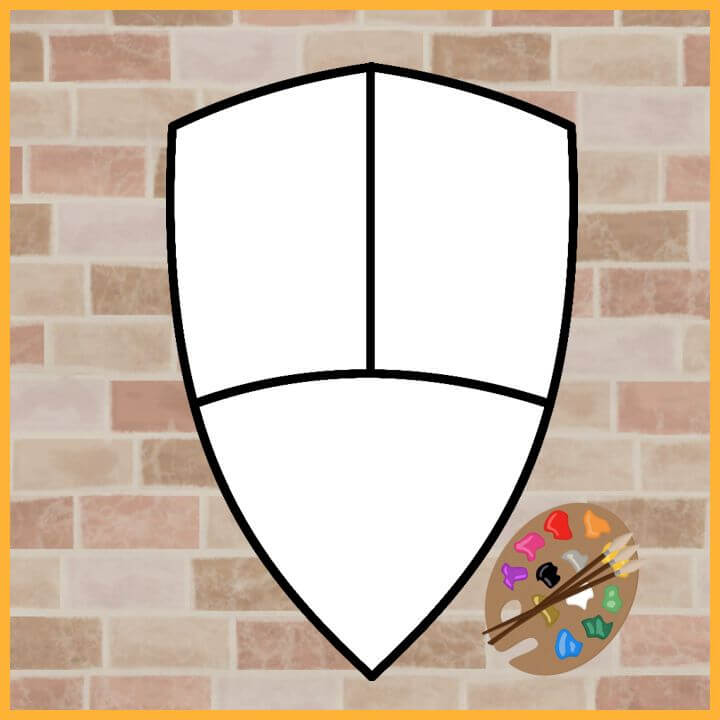
Shield
Hint 1A
Solve the secret code first.
Hint 1B
The secret code will give information on what needs to happen with the shield.
Hint 2A
find the painter palette.
Hint 2B
The painter’s pallete can be found after solving the paintings puzzle.
Hint 3
Place the shield on the shelf and place the painter’s palette with the shield.
Follow the instructions of the secret code to give the shield the correct colors and symbols.
Answer
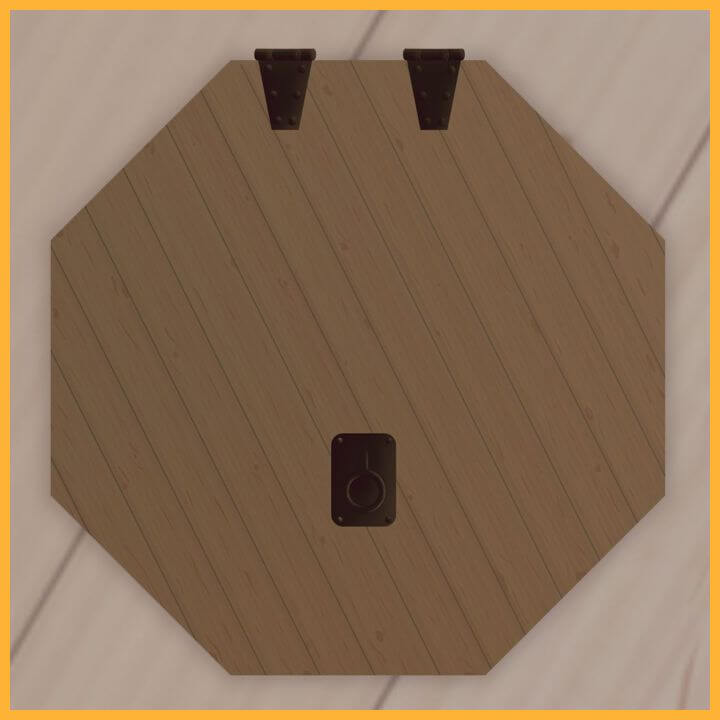
Hatch
Hint 1
First, you need to solve all the puzzles to open the hatch.
Hint 2
The hatch will open after the shield is set on the shelf and has the correct symbols and colors.